Mount Rinjani Summit Trek 3D2N from Sembalun Review
Mountain climbing has been on my mind for a while and we have some interesting climbs in the South East Asia region. After several failed attempts to climb this year (we ended up in JKT and Perth instead), we turned our "failed" South Africa trip into a "do nothing and chill (but still climb Mount Rinjani" holiday. Yes. Climbing a mountain is our idea of doing nothing. I mean, it's just a 3276m uphill no? Well, more on that in a bit.
We went with Adi Trekker given their excellent reviews and paid USD280 each (not inclusive of tips). We were told it was only gonna be us but there were 2 other trekkers and i think they paid lesser (probably USD250). You could possibly bargain with Adi if you want but we didn't. Of course, there are plenty of cheaper options if you were to book your trip in Lombok but you are likely to end up in a very big group (we've seen groups that are 12 - 14 pax with only 2 guides), and you will definitely not be as comfortable.
 Our deluxe trek included the following:
1. Land transfers- Between airport/jetty/hotel and Senaru before and after the trip.
2. One night stay in a basic "hotel" (more like homestay type) at Senaru prior to the start of the trek. There's no AC but at least there's a hot shower.
3. Guide, porters, and entrance fee. The porters will carry all the food, drinks, and tents for you. You'll only need to carry your own backpack (clothes and gear) and other personal snacks if you wish. You can also pay more to hire a porter to carry your personal items.
4. Heaps of food with fruits, water, beverage, snacks (chocolate wafers and cookies) throughout the trek. Think local Indonesian food that is hearty and comforting. We also had Bintang beer! We were provided with camping chairs to sit on when we have our meals.
5. Good tent with thick mattress
6. Super warm sleeping bags with pillows
7.Toilet tent (pitched at campsite) to protect your modesty. Other than that, it's just a dump hole.
Tipping
We didn't quite know how to tip and it wasn't easy finding the "market rate". So based on what we found, for a 3d2n, you should tip 100k per porter, and 300k for the guide. Thing is we didn't know if it's supposed to be a group thing or what. So that's what we gave for the 2 of us. Feel free to give more for their hard work! We also gave our trekking poles to our guide as well.
The itineraries are all the same, so pick the one that fits your schedule. If you wanna summit and trek different terrains, do the 3d2n, or 4d3n for a slightly less strenuous version (since it's the same route with just more time to complete it). To save time, minimize discomfort (of not showering) and maximize chilling, we opted for a 3D2N summit trek via Sembalun. TIP: Starting at Sembalun is a better idea for a summit climb as you'll have more energy for the summit on the 2nd day instead of on the last day if you had started from Senaru.
How to prepare for a Mt Rinjani summit trek?
One would think that with regular runs, HIIT, yoga, and wakeboarding sessions, this mountain wouldn't be that much of a big deal right? WRONG. You probably should do lots of stairs and rock climbing, and inclined marathon runs to prep for this trip. We didn't die but there were times we questioned wth did we choose to torture ourselves. If it's for the view, forget it guys. You can enjoy an equally gorgeous sunset from your ocean bedroom in Maldives. But if you are out for a physical and mental challenge, Mt Rinjani will deliver.

Tips on packing for your Mt Rinjani trek!
1. Sweat wicking clothes for the regular treks- my yoga wear served me very well (it's Liquido pants and Lululemon).
2. Warm clothes for the nights and summit- Waterproof windbreaker is definitely required for your summit trek. I also bought the Forclax 200 Women's hiking fleece ($19.90) to keep me warm at night. You should probably also bring gloves to keep your fingers toasty for the summit climb and a beanie if you don't have a jacket hood.
3. Trekking boots- Recommended! Sure you can go around in sneakers (the porters can climb in slippers) but you'll be in for a slippery hike. Our Timberlands were very grippy and provided great ankle support (i could have sprained my ankle when i landed on it but i didn't thanks to my boots). Sure they may be expensive but we used them so well. Mine was the waterproof Goretex ones and they were really light and comfortable and i didn't even have to break them in. Plus i didn't get any blisters as well! The same cannot be said for Jr and he suffered from 2 huge blisters at the back of his heels. Sure they are expensive but it's the best buy for the trip (other than the trekking poles).
4. Trekking socks- Remember to get the high ones and make sure it forms a muffin top around the top of your boots so that sand/soil/rocks doesn't get into your boots easily). I bought a pair of warmer ones from Timberland ($25/pair) and also the Forclaz 500 mid high trek socks ($12.90/2pairs)
5. Trekking poles- Recommended! Ours came in very handy and helped usa great deal, especially with steep downhills. We shared our poles with the couple in our group on the last day as the descend can be quite slippery. They are a little trickier with uphills because you will have to switch between free climbing and using your poles to provide some leverage. They are very useful for the summit too!
6. Headlamp- To illuminate the tent at night, nightly toilet runs, and summit climb. 80 lumens is good enough.
7. Wet wipes and Snack Brand Prickly Heat powder- Recommended! This is the best solution for not showering. Do a proper wipe down and then powder everywhere. Plus it also keeps the bugs away apparently. #endorsedbySingaporeArmy
8. Medication and plasters (lots of it)- You may experience some altitude sickness and breathlessness (not sure if it's just from the climbing). Blisters are very common and i'll recommend getting the bigger blister plasters from Guardian or Watsons.
TIP: Decathalon is the best place to get your trek stuff IF you're not a serious, heavy duty trekker/mountaineer. We got our dry bags, ponchos, 80 lumens Onnight 100 hiking headlamp ($9.90), Arpenaz 200 hiking poles ($13.90/pair) and socks from there. Jr also bought a backpack for $40 and it has all the right compartments, even hooks for the poles.
Day 1
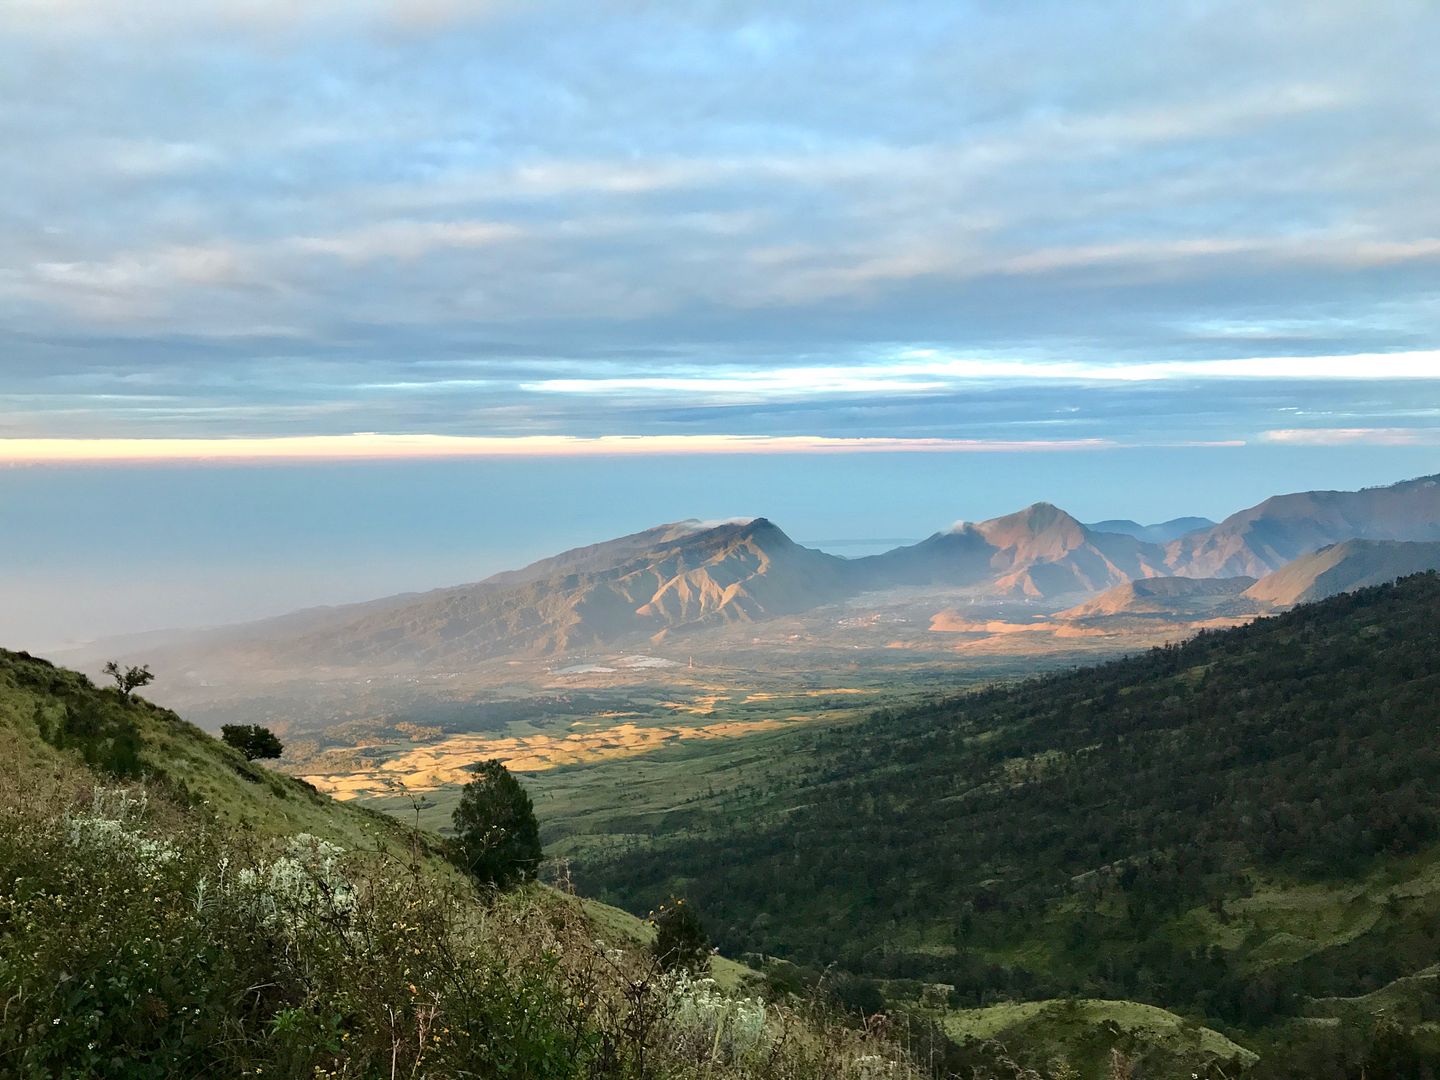
We were picked up by our driver at our Senaru accommodation before 7am for a 1 hour ride to Sembalun Village (1150m). The climb up to our campsite at Sembalun Crater Rim (2639m) started proper at about 8am.
 The first part of the trek was through the rather open plains with an increasing incline. The journey only gets tougher from here. With a small group, you can take breaks any time you want but generally there's a rest stop every 1 to 2 hours. Lunch was at POS 3 Pada Balong (1800m) after a 3.5 to 4h climb.
 Here we experienced our first camp meal! Everything that we ate/drank was carried by our amazing porters. Just imagine the load they have to carry! Even though they climb in slippers, they are always faster than us. We are always welcomed by hot food and beverage when we reach our lunch spot/campsite.

We were picked up by our driver at our Senaru accommodation before 7am for a 1 hour ride to Sembalun Village (1150m). The climb up to our campsite at Sembalun Crater Rim (2639m) started proper at about 8am.

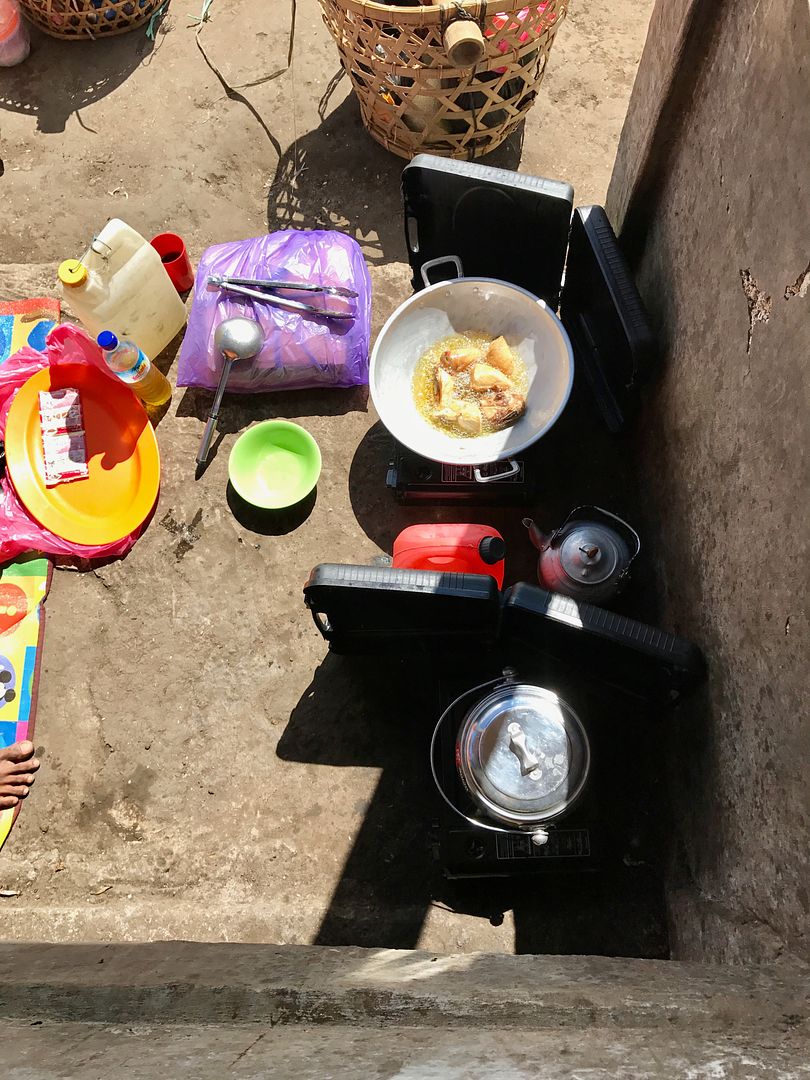

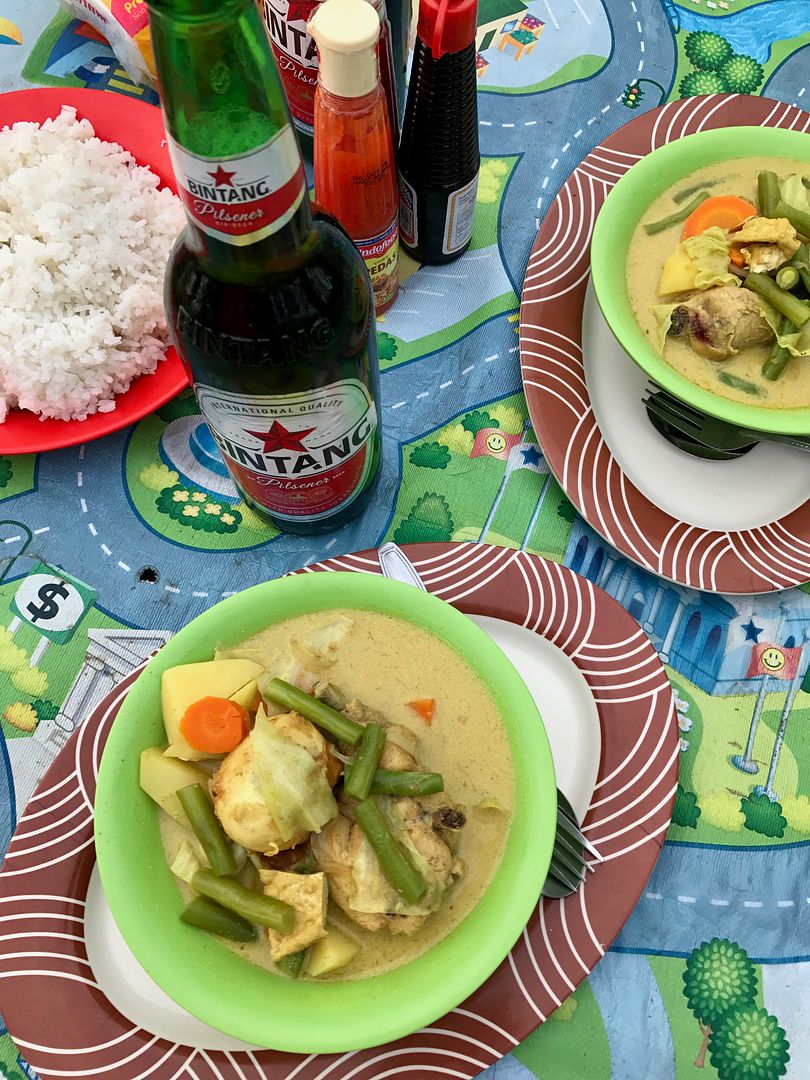
Our first meal which was a mountain of stir fry vegetables, fried chicken, omelette, tofu and tempeh, chicken frank, and rice. On the drinks menu, there's Pocari Sweat, coffee/tea (we always chose ginger tea), hot chocolate, and water. A fruit platter is served at the end and there's a mix of apple, orange, rock melon, watermelon, banana, and pineapple.
 A gruelling 3-hour steep climb to the Sembalun Crater Rim (2639m) quickly followed after lunch. The weather was pretty cool and that certainly helped with the climb. However, we really weren't prepared for the continuous "stair-climbing" and it took me the whole of day 1 to get used to it.

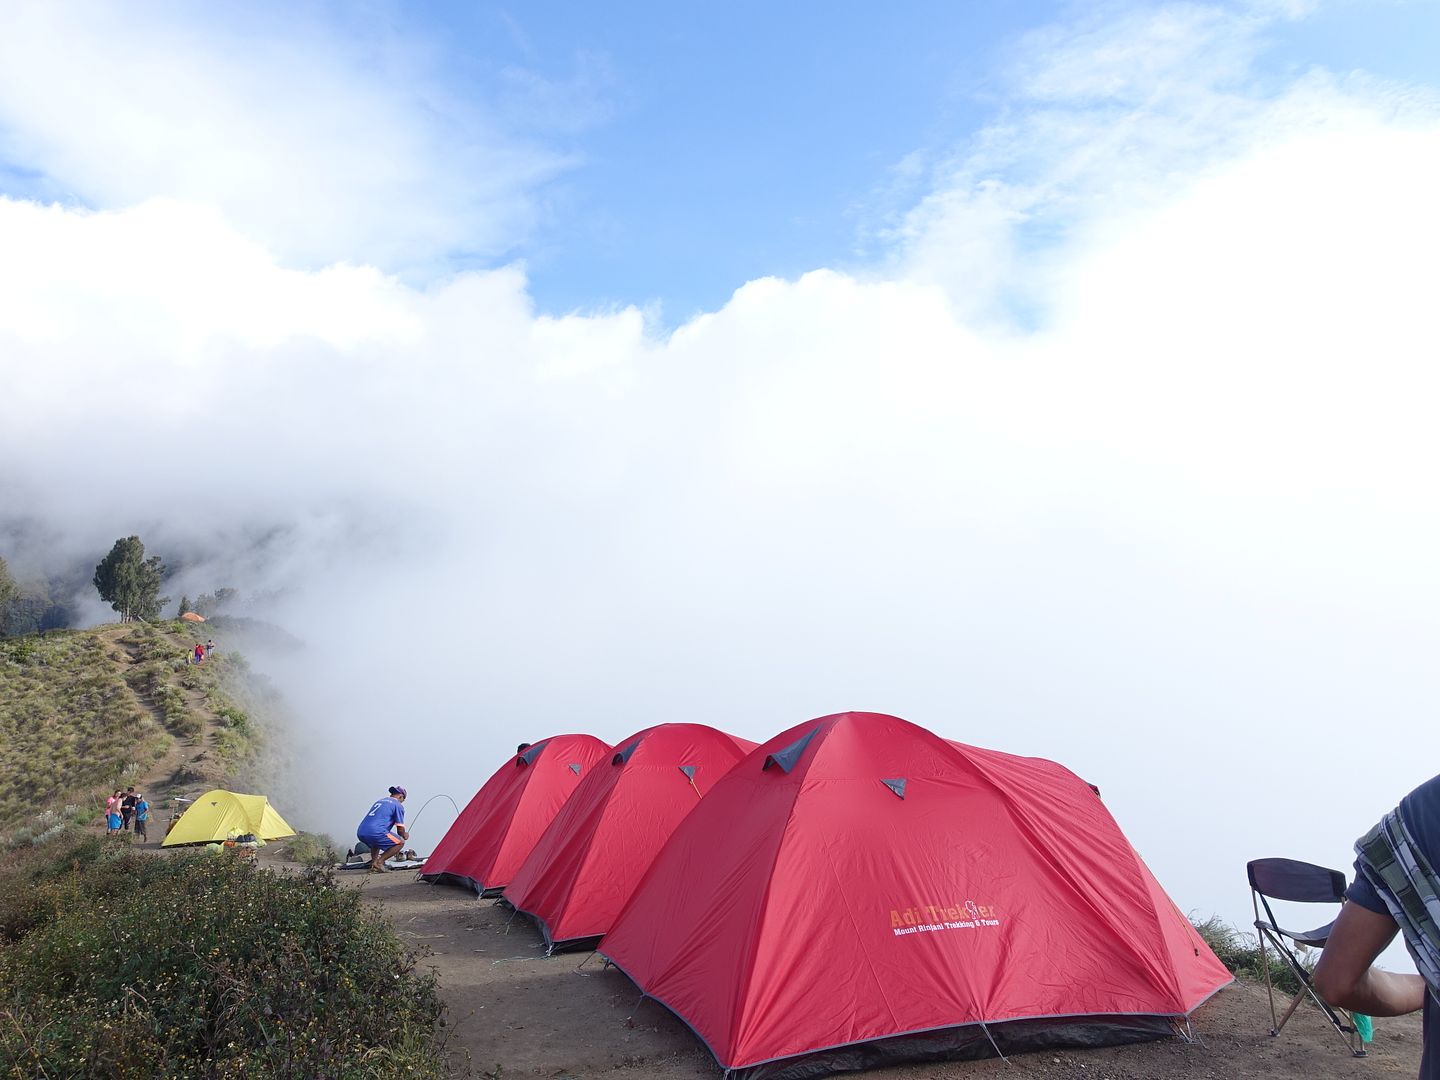
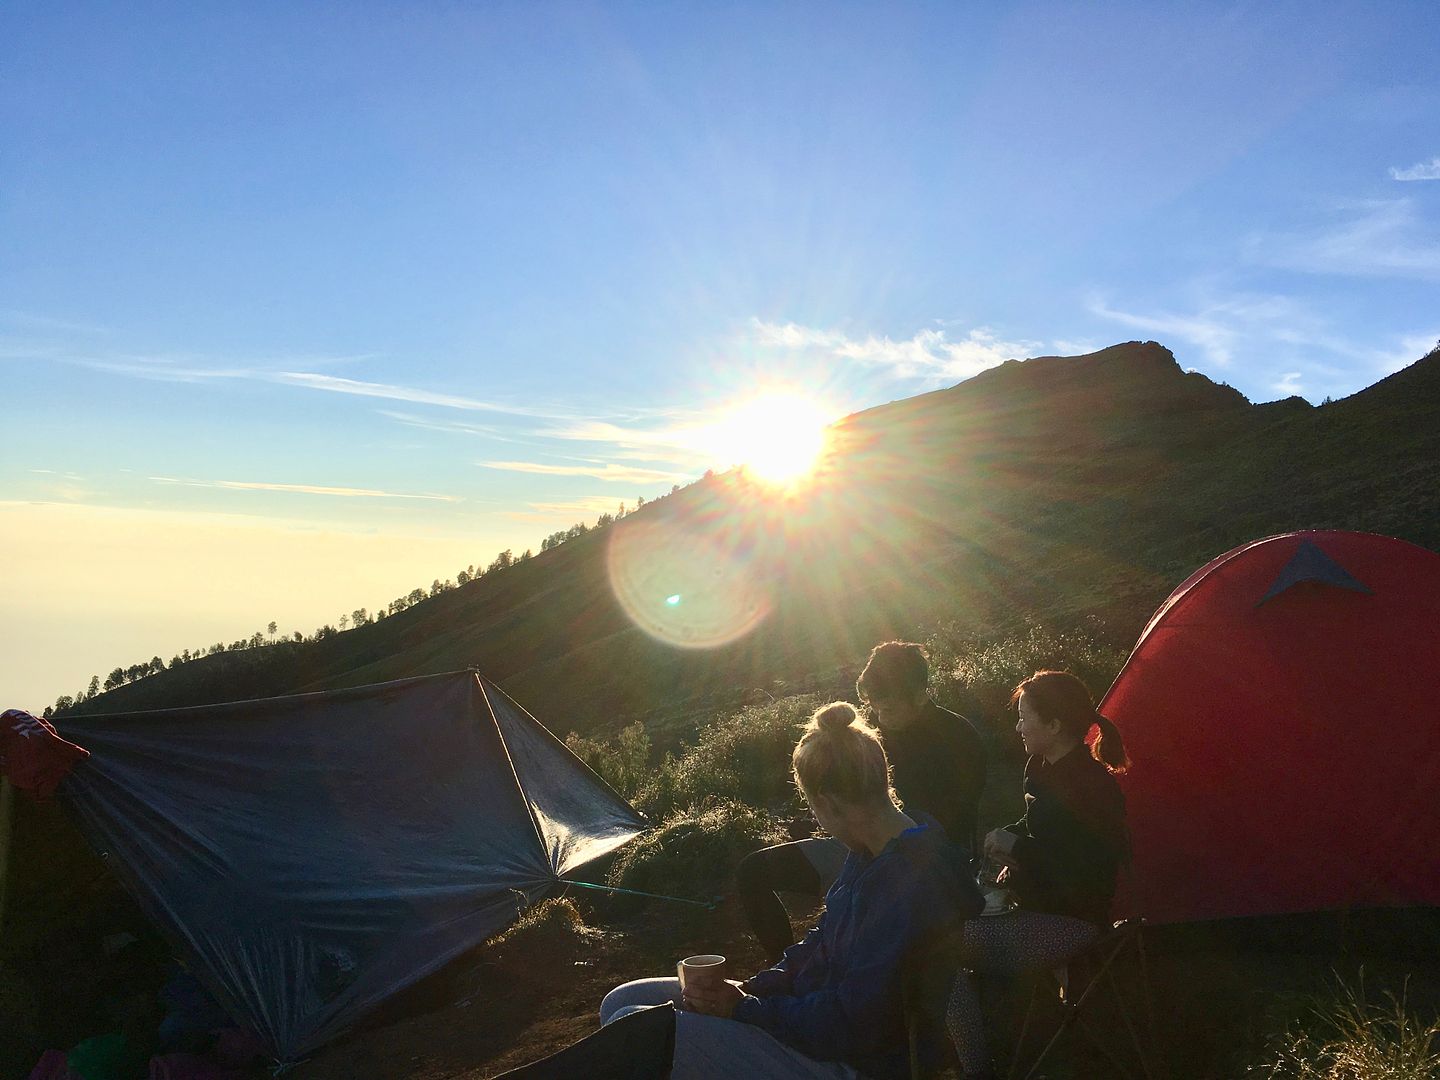
And guess what? Our porters had already pitched our tents and were cooking dinner when we arrived! While we were "washing up" with our wet wipes and powder bath, we were served a snack to reward us for the tough climb!
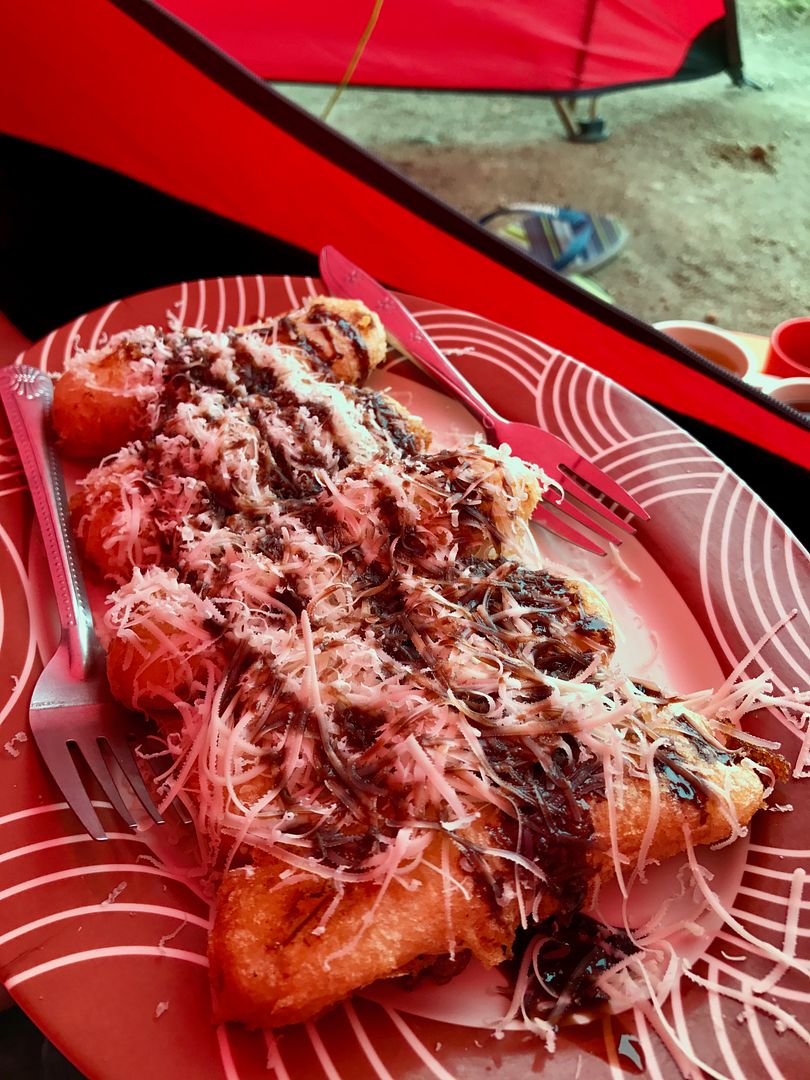
Fresh goreng pisang (fried banana fritters) with chocolate sauce and cheese, with our choice of hot ginger tea. LIFE IS GOOD.

Plus this sunset view of the Segara Anak lake while having dinner. Chicken curry (lontong style with mild coconut flavor and light spice) with rice, Bintang, and also a surprise popcorn snack for dinner!
Once the sun sets, there's nothing else to do but rest. Make sure you get all your packing done while there is still light. A night light is a must and our head lamp served us very well for toilet trips and packing at night. We went to bed by 7.30pm!

The day starts at 2.30am for a light sandwich breakfast and coffee and we started the 1+km climb up to the summit in the cold darkness. It's important to keep warm! I had my gloves and jacket on the whole time.
The first 20% of the climb is actually one of the hardest part (about an hour)! Pace yourself for it. It's easier to get out of the way of climbers for a short rest here. Don't worry, it gets slightly easier after this. You have a brief 30 mins long trek before continuing with a steep 1h climb up the loose volcanic rocks to the summit.
The first 20% of the climb is actually one of the hardest part (about an hour)! Pace yourself for it. It's easier to get out of the way of climbers for a short rest here. Don't worry, it gets slightly easier after this. You have a brief 30 mins long trek before continuing with a steep 1h climb up the loose volcanic rocks to the summit.
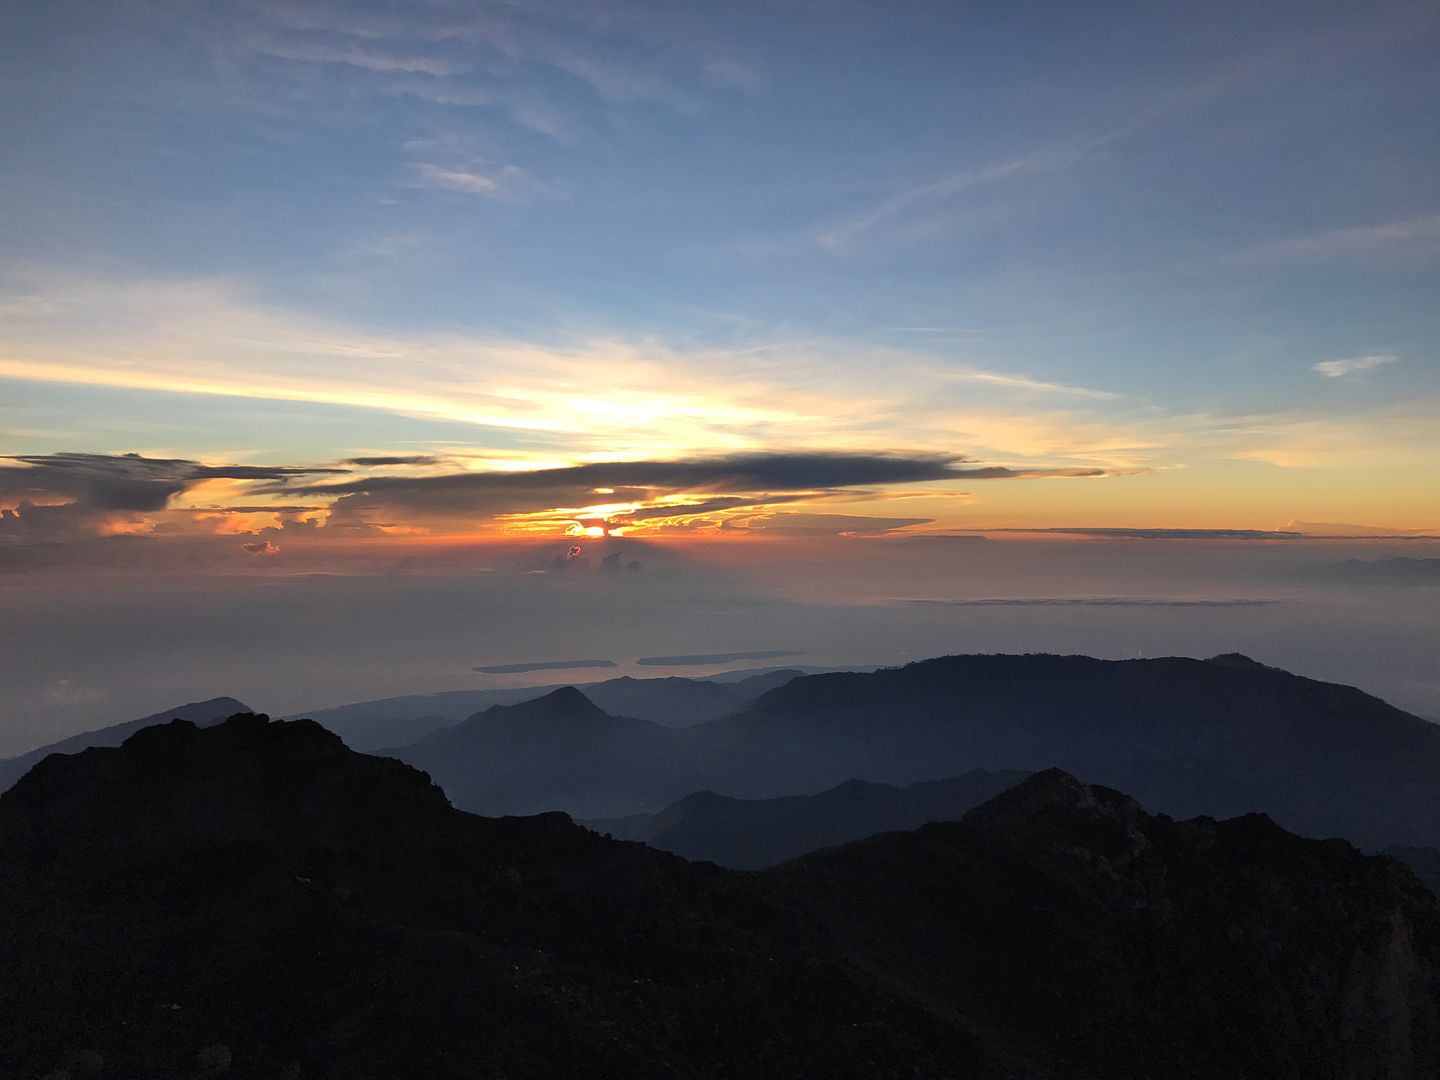
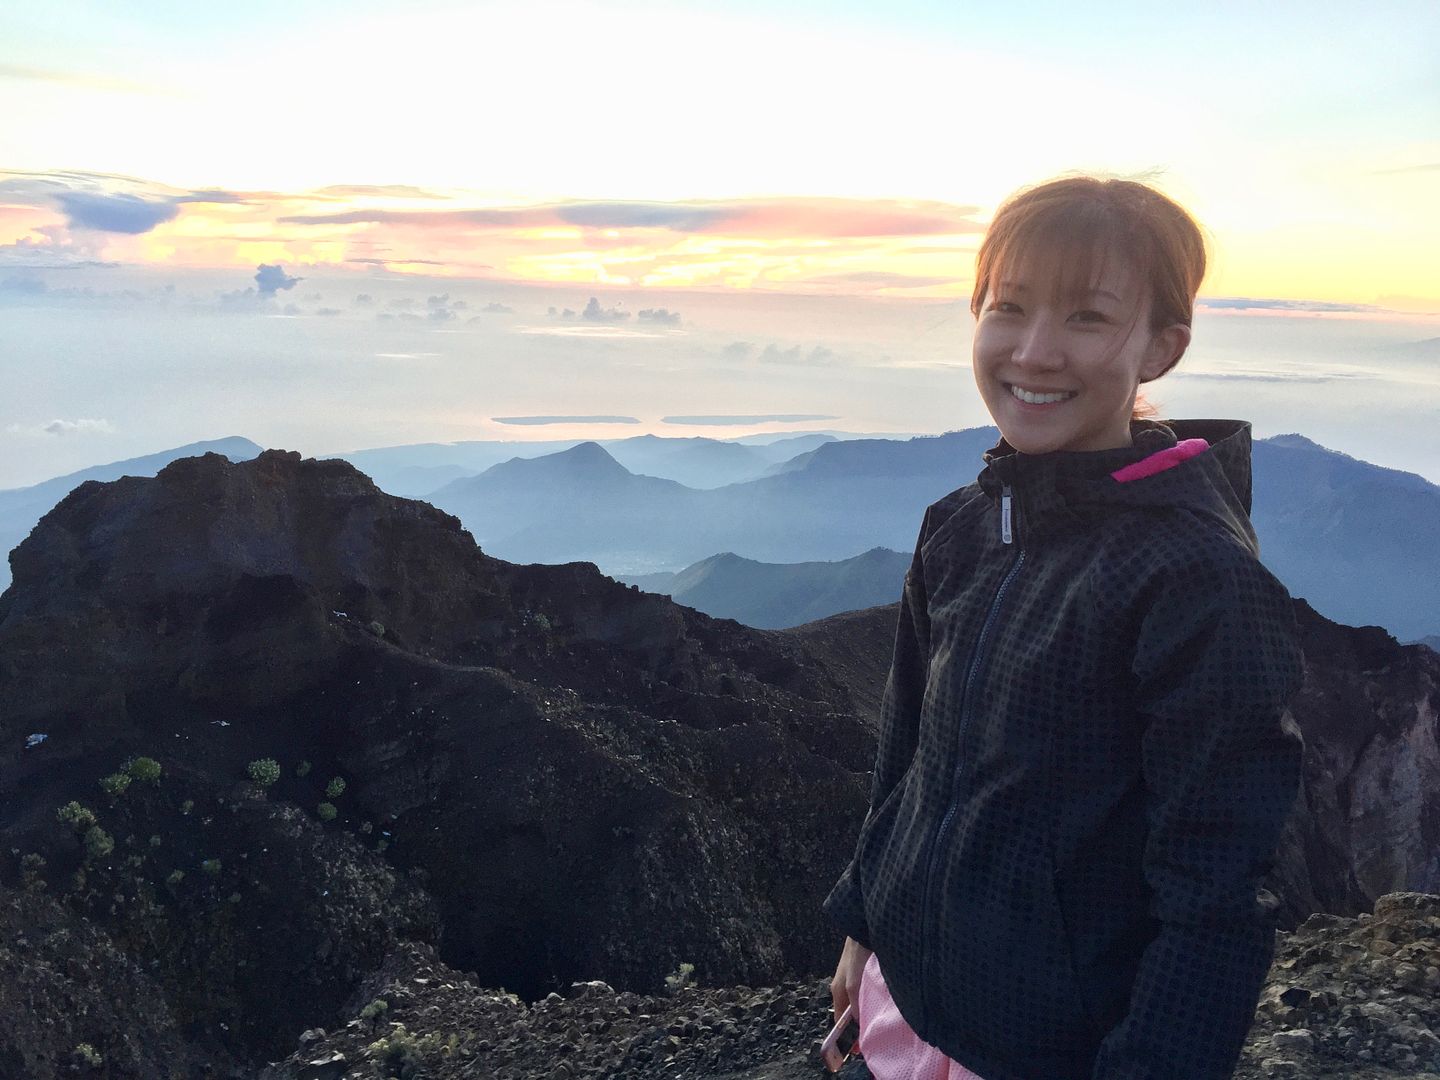
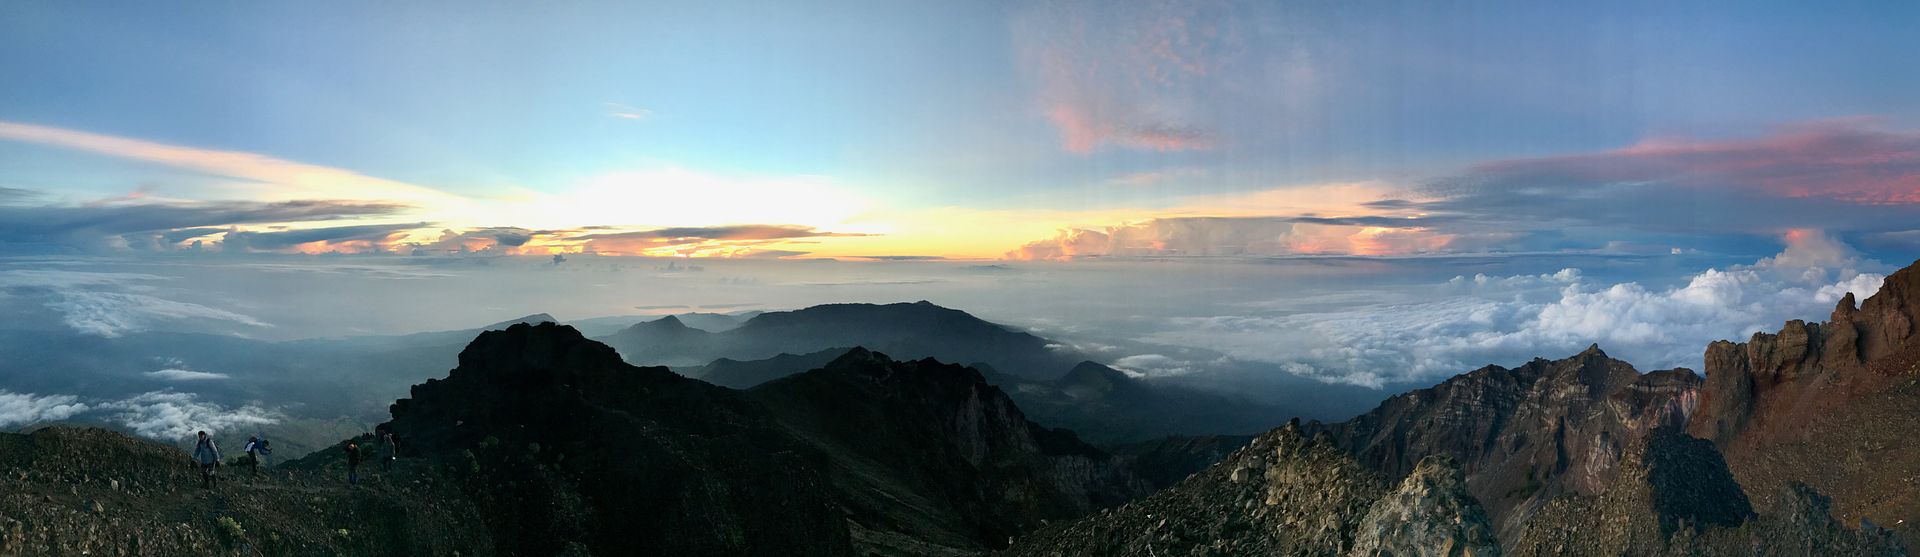
We summited just in time to catch the sunrise at about 6.40am. That took us about 3.5h with some puking involved (LOL #notme). You may want to start a bit earlier just in case you miss the sunrise.
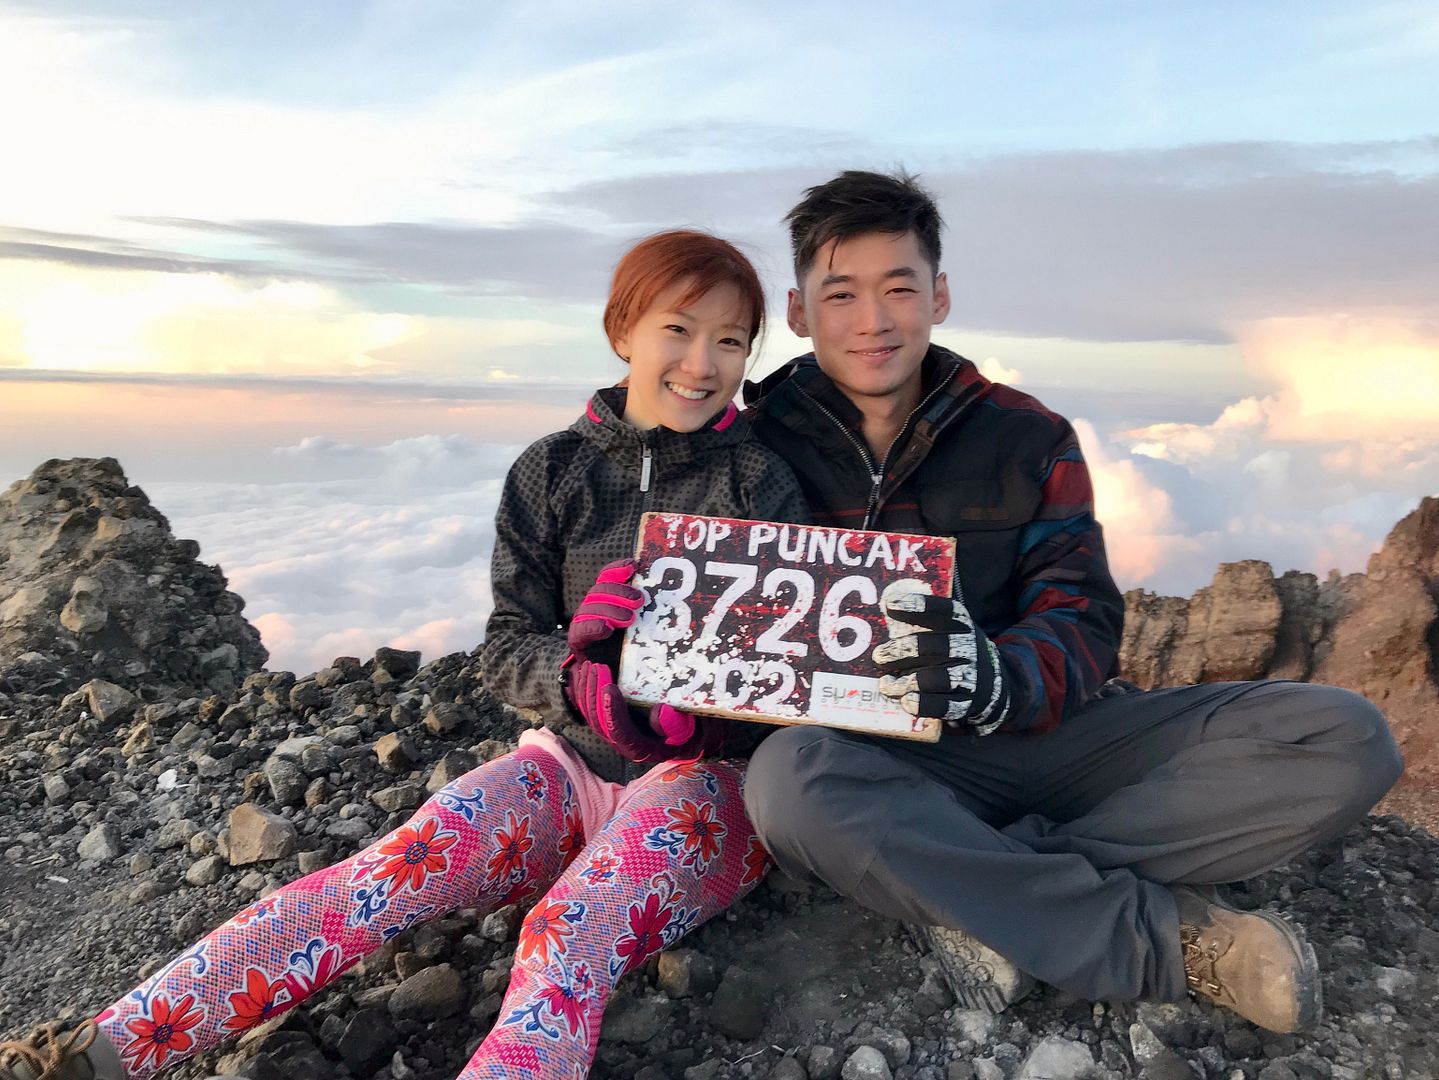
At 3726m above sea level! Jr was starving by the time he reached the top and immediately devoured an entire tray of Tim Tams! It's crazy cold up there at the summit and we honestly couldn't bear to stay there for too long. Told you it wasn't for the sunrise. Plus what goes up must come down. Get ready for a sandy ride down as the scree can be very slippery. Jr suffered from a very bad scratch on his forearm and i landed on my bum too many times.
 Our descent from the summit was a lot faster and we reached back just a little after 8am. The day doesn't end here. After an hour's breakfast, we continued downhill to the lake. It's all huge rocks on the way down and took us about 2.5h. Jr and i are better with downhills (the poles really helped) but we were all moving quite fast because we were promised a soak in the hot springs near the lake!
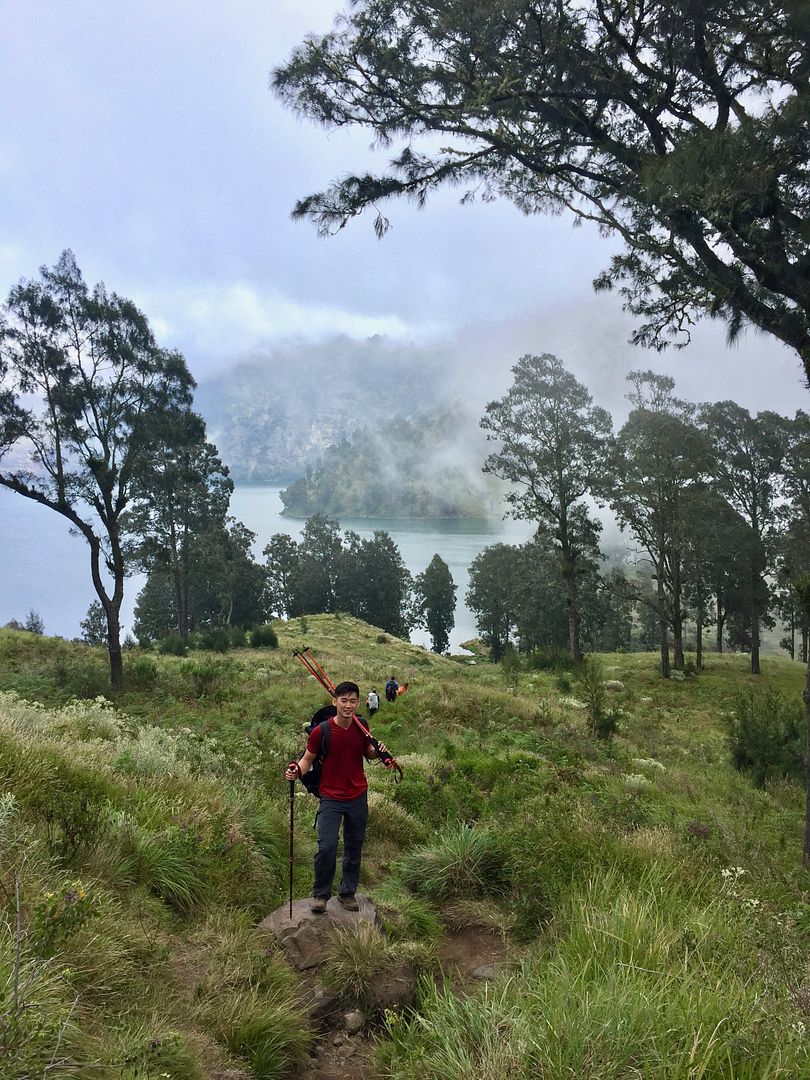
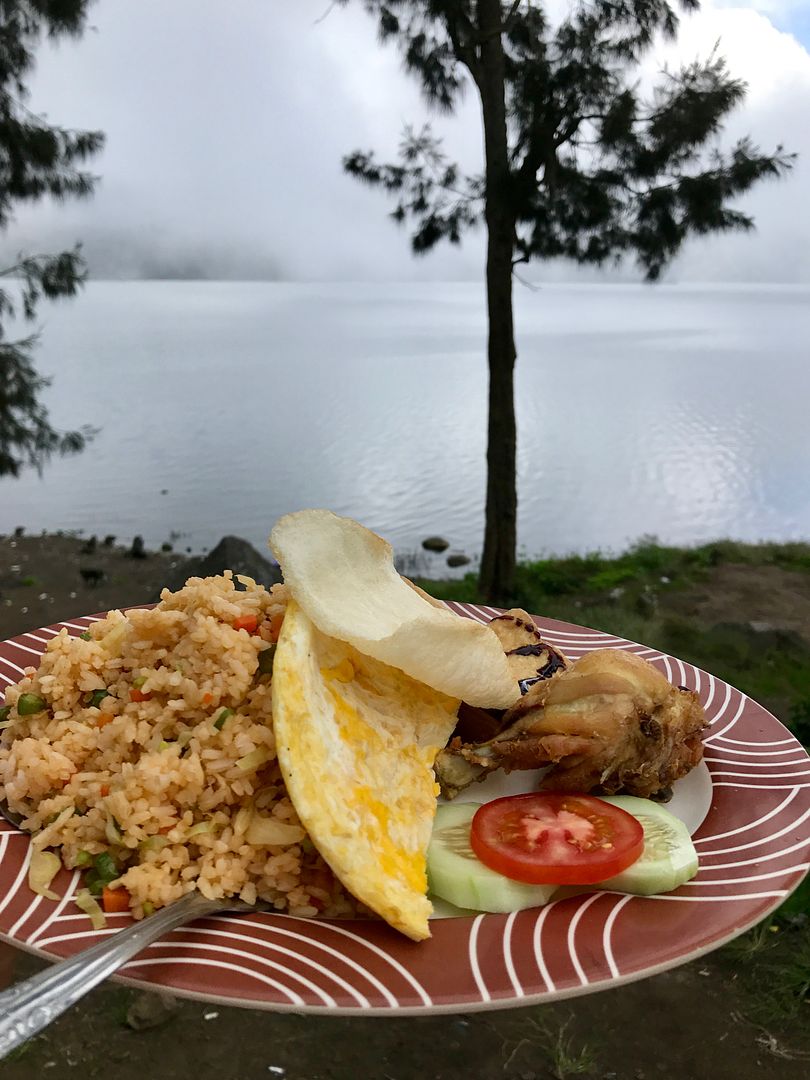
Time for a swim! Mind you the water at Segara Anak lake is cold. The hot springs are about 100m from the lake. Do not make the mistake of wearing your slippers there. Our guide played a joke on us and i really felt like killing him. Jokes aside, our guide Mala was awesome and helped us a lot during our climb. The hot springs were awesome and really helped to soothe the aches, even if it was for a short while.

The joy from the hot springs and the comforting nasi goreng lunch did not last long as we started on a crazy steep scramble up to the Senaru Crater Rim. It was 3 hours of climbing and a large part of it involved using our hands to pull ourselves up the rocks. Plus it also started raining and well it's not that easy climbing with poles and poncho. Dinner was in our tent due to the rain and we each had a mountain of fried maggi mee with our hot ginger tea as usual. The insane day of trekking left us pretty much dead to the world that night and we clocked an impressive 12 hours of sleep!
Day 3
Be prepared by the ache from Day 2's climb. Thankfully it's downhill all the way. That said, it's still rather harsh on the knees and ankles. The forest terrain at this part was a bit slippery. We were really thankful for our poles once again. We were still expecting a long trek actually but it ended much earlier! It was about 2-2.5h to our very last lunch on Mt Rinjani and we had spaghetti bolognese!
Be prepared by the ache from Day 2's climb. Thankfully it's downhill all the way. That said, it's still rather harsh on the knees and ankles. The forest terrain at this part was a bit slippery. We were really thankful for our poles once again. We were still expecting a long trek actually but it ended much earlier! It was about 2-2.5h to our very last lunch on Mt Rinjani and we had spaghetti bolognese!

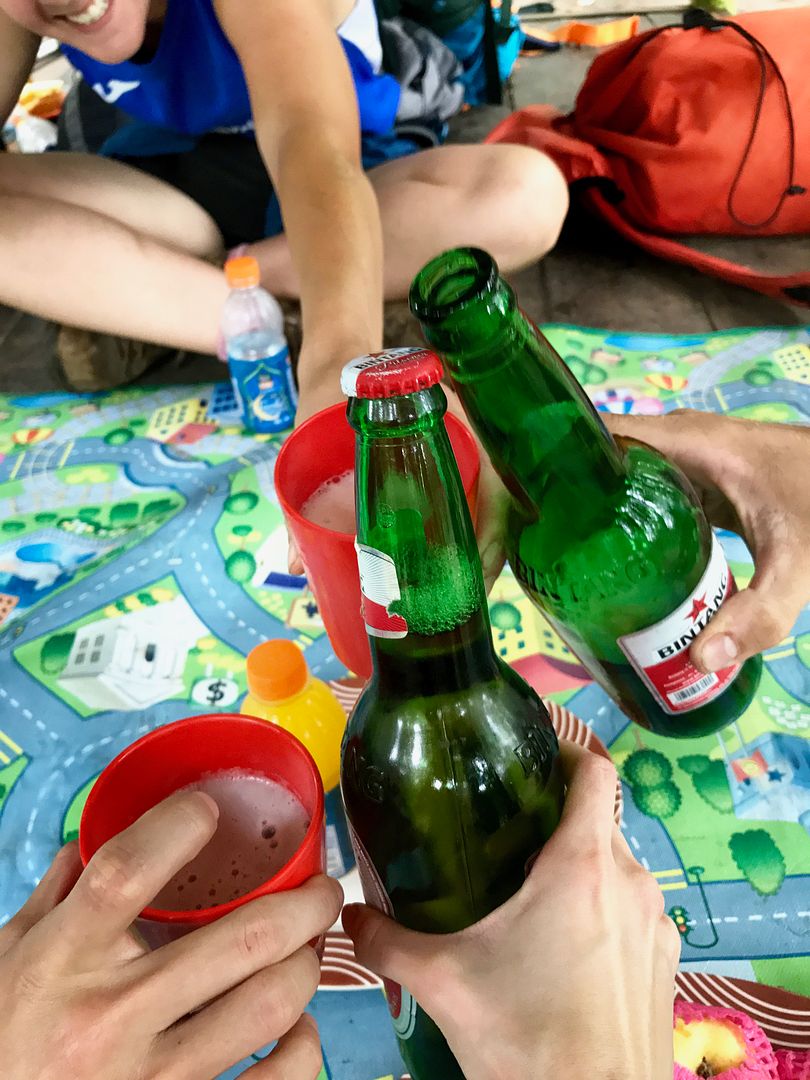
Celebratory Bintang!! The trek ended quite shortly after lunch and we got to Senaru Village by 12.30pm for our transfer to the next segment of our travels.

Happy Smelly Campers! This was the most exhausting thing I've done in my life but it was certainly a memorable and enjoyable experience for the both of us. Also, if you want to stress test your relationship, try climbing a mountain! LOL Needless to say Jr and I aced this challenge. :)) Just don't bring your princessy other half here unless you want to be killed, or to kill someone.


0 comments
Comments